

Your heating bill probably makes you wince every January. But here’s something most Quebec homeowners don’t realize: those expensive drafts aren’t just coming through your windows. The biggest culprit is hiding right above your head.
Air leaks in your attic can account for a significant portion of your heating costs. When warm air escapes through gaps in your attic floor, your furnace works overtime to compensate. In Quebec’s harsh winters, where temperatures regularly drop below -20°C, this becomes an expensive problem fast.
The Hidden Energy Drain in Your Attic
Think of your attic like a chimney. Warm air naturally rises, and if there are gaps in your attic floor, that heated air you paid for just floats right out through the roof. This isn’t a small issue. Air leakage can represent a substantial portion of your total heating and cooling costs.
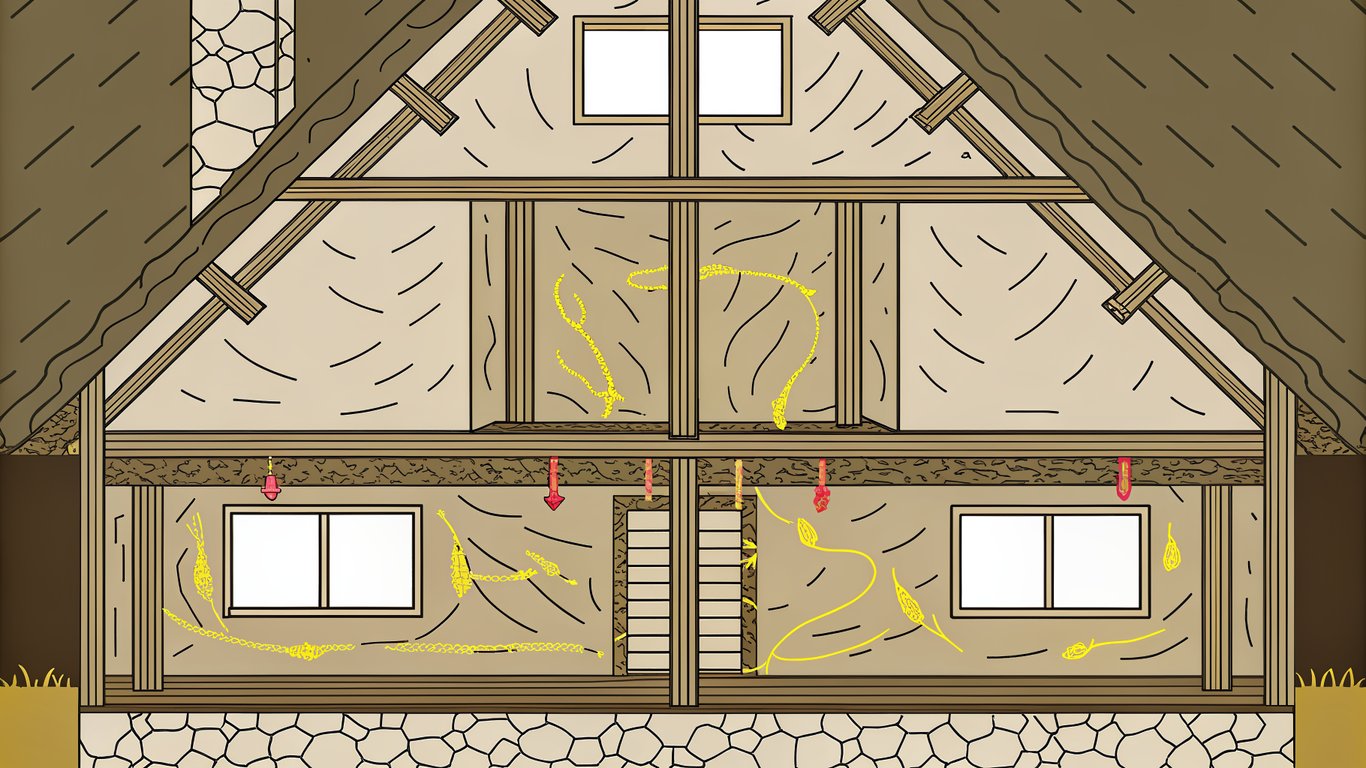
Quebec’s extreme temperature swings make this worse. We’re talking about temperature differences of 40°C or more between your living space and the outside air during winter. That temperature gradient creates powerful air currents that push warm air through even tiny cracks.
How Air Leaks Compromise Insulation Performance
Here’s the thing about insulation: it only works when air isn’t moving through it. You could have a foot of insulation in your attic, but if air is flowing through gaps underneath it, you’re wasting most of that insulation’s potential.
Moisture is another problem. When warm, humid air from your house hits the cold attic space, condensation forms. This moisture can damage your insulation, rot your roof structure, and create perfect conditions for mold growth. In Quebec, this also leads to ice dams on your roof edges, where melting snow refreezes and causes water backup under your shingles.
Understanding Common Attic Air Leak Sources
Before you can fix air leaks, you need to know where they hide. Most homeowners are surprised to learn that the obvious spots like windows and doors aren’t the main problem. The real air leaks are in places you can’t see without climbing into your attic.
Top Plate and Wall Penetrations
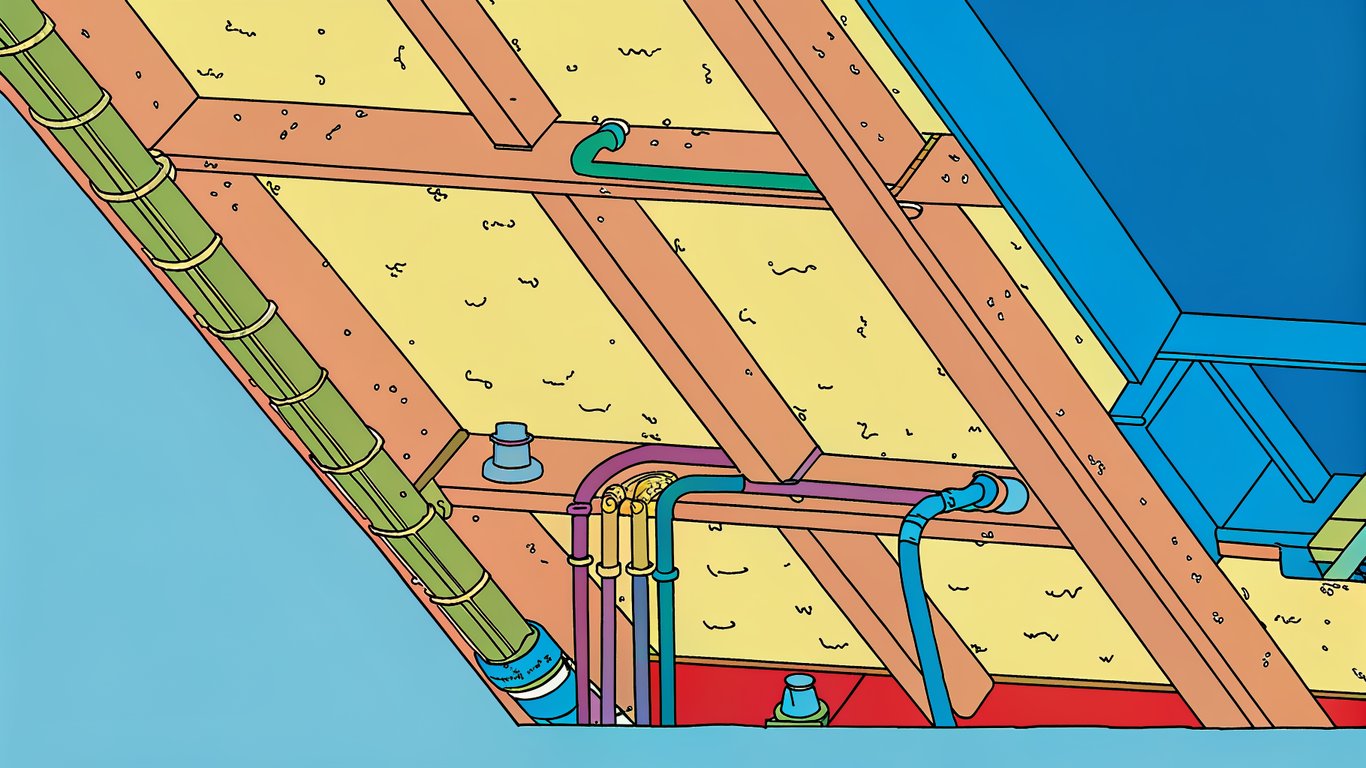
The top plate is where your interior walls meet the attic floor. This junction creates a continuous gap that runs along every interior wall in your house. Builders often don’t seal these gaps during construction, and they can add up to several square feet of open space.
You’ll find these leaks hidden under your insulation, running along the edges of your attic floor. They’re not obvious, but they’re probably the biggest source of air leakage in your home.
Plumbing and Electrical Penetrations
Every pipe, wire, and duct that passes through your attic floor creates a hole. Plumbing vents are particularly bad because they’re often surrounded by gaps that are several inches wide. Electrical wires typically pass through drilled holes that are much larger than the wires themselves.
HVAC ducts in unconditioned attics are double trouble. Not only do they leak air where they penetrate the ceiling, but the ducts themselves often have leaky joints that waste conditioned air directly into your attic space.
Recessed Lighting and Ceiling Fixtures
Recessed lights are basically holes in your ceiling. Older fixtures weren’t designed to be airtight, and they create direct pathways for air to flow from your living space into the attic. Some fixtures also generate heat, which creates a chimney effect that pulls even more air through the gaps.
Ceiling fans, light fixtures, and electrical boxes all create similar problems. Each one is a potential leak point that needs attention.
Attic Hatch and Access Doors
Your attic hatch is often the single largest air leak in your entire house. Most hatches are just a piece of plywood sitting in a frame with no weatherstripping and minimal insulation. It’s like leaving a window open all winter.
Pull-down attic stairs are even worse because they have gaps on all four sides plus the folding mechanism creates additional openings.
Chimney and Furnace Flue Chases
The space around chimneys and furnace flues is tricky. Building codes require clearance between these hot surfaces and combustible materials, which means there’s often a large gap that allows air to flow freely. These gaps can be several inches wide and run from your basement all the way to your roof.
Dropped Soffits and Ceiling Cavities
Dropped soffits in kitchens and bathrooms create hidden cavities that connect directly to your attic. These architectural features often have no air barrier at the top, creating a direct pathway for air to flow from your living space into the attic. You can’t see these leaks without removing drywall or accessing them from the attic side.
Tools and Materials Needed to Seal Attic Leaks
Learning how to seal attic leaks starts with having the right equipment. You don’t need a contractor’s full arsenal, but you do need specific tools and materials that can handle Quebec’s climate extremes.
Safety Equipment and Protective Gear
- Respirator mask (N95 minimum, P100 recommended for fiberglass insulation)
- Safety glasses or goggles to protect from insulation fibers
- Disposable coveralls or long sleeves and pants you can throw away
- Work gloves (leather or rubber depending on materials)
- Headlamp or clip-on light (you’ll need both hands free)
- Knee pads for crawling on joists
- Hard hat if your attic has low clearance
Don’t skip the respirator. Fiberglass insulation particles and dust in attics can cause serious respiratory irritation. If you’re working with spray foam, you’ll need even better ventilation and protection.
Detection and Assessment Tools
- Flashlight (high-powered LED recommended)
- Incense sticks or smoke pencil for visual air leak detection
- Infrared thermometer or thermal imaging camera (optional but helpful)
- Measuring tape for documenting leak locations
- Camera or smartphone for taking reference photos
Sealing Materials: What Works Best
Different leak types require different materials. Here’s what you’ll need:
| Material | Best For | Quebec Climate Notes |
|---|---|---|
| Expanding spray foam | Large gaps, top plates, wall penetrations | Use low-expansion foam to avoid warping framing |
| Caulk (acrylic or silicone) | Small cracks, electrical boxes, trim | Choose paintable acrylic for visible areas |
| Rigid foam board | Attic hatches, large openings, dropped soffits | XPS or polyiso works well in cold climates |
| Weatherstripping | Attic doors and hatches | Self-adhesive foam tape is easiest |
| High-temperature caulk | Around chimneys and flues | Must be rated for 260°C minimum |
| Foil-faced tape | Ductwork seams | Not regular duct tape, which fails quickly |
You’ll also need a caulking gun, utility knife, straightedge, and possibly a foam gun if you’re using professional spray foam canisters.
Step-by-Step Guide: How to Find Attic Air Leaks
Finding leaks is half the battle. You can’t seal what you can’t see, and many air leaks are hidden under insulation or in hard-to-reach corners.
Conducting a Visual Inspection
Start by looking for the obvious stuff. On a sunny day, turn off your attic lights and look for daylight coming through gaps. Any place you can see light is a place where air can flow.
Check your insulation for dark stains or discoloration. These marks show where dusty air has been filtering through gaps over time. It’s like a roadmap of your air leaks.
Look for these specific problem areas: around the attic hatch, where walls meet the attic floor, around plumbing vents, near recessed lights, and around the chimney chase.
The Smoke Test Method
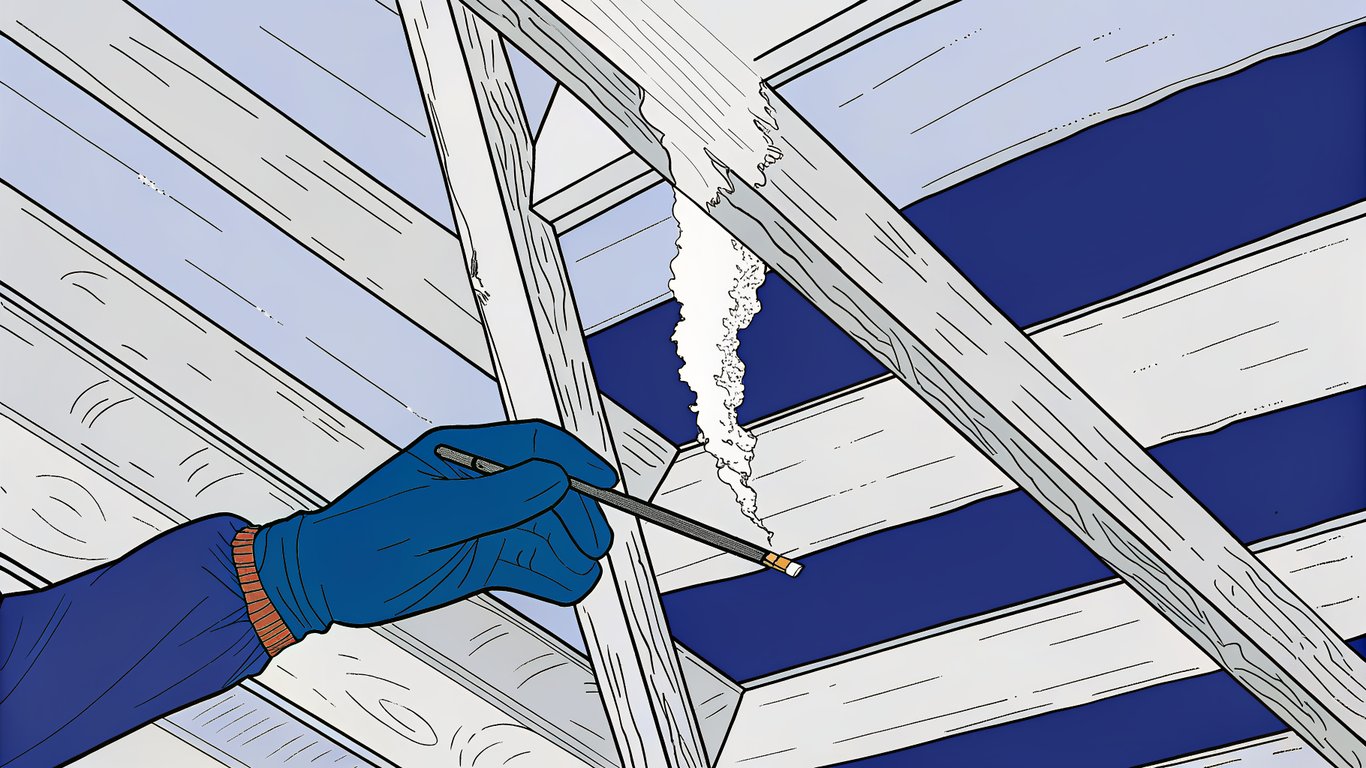
Pick a cold, windy day for this test. The temperature difference and wind pressure will make air leaks much more obvious. Light an incense stick or use a smoke pencil and hold it near suspected leak areas.
Watch the smoke. If it gets sucked toward a gap or blown away from an opening, you’ve found an air leak. This works best when you have someone else in the house who can help create pressure differences by closing doors or running exhaust fans.
Using Thermal Imaging to Detect Leaks
Thermal cameras show temperature differences that indicate air leakage. You’ll see cold spots where outside air is infiltrating and warm spots where heated air is escaping. Some hardware stores rent these cameras, or you can use a smartphone attachment.
The best time for thermal imaging is during extreme temperature differences. In Quebec, that means winter mornings when it’s -20°C outside and 20°C inside.
The Blower Door Test Approach
A blower door test uses a powerful fan to depressurize your house, making air leaks much easier to find. Professional energy auditors use this equipment, and it’s probably worth hiring someone if you want precise measurements of your home’s air tightness.
The test will give you a number (air changes per hour) that tells you how leaky your house is. It also makes the smoke test method much more effective because the pressure difference is so much greater.
How to Seal Attic Leaks: Detailed Techniques
Now we get to the actual work. Each type of leak requires a slightly different approach, but the basic principle is the same: create an airtight barrier between your living space and the attic.
Sealing Top Plates and Framing Gaps
Pull back the insulation along your interior walls to expose the top plate. You’re looking for the gap between the drywall and the framing. This gap runs continuously along each wall.
Use expanding spray foam for gaps wider than 6mm. For smaller cracks, caulk works fine. Apply the foam in a continuous bead along the entire length of the wall. Don’t overfill because expanding foam can warp framing if you use too much.
Let the foam cure completely (usually 8 hours) before replacing the insulation. Trim any excess foam that expanded beyond the gap.
Sealing Around Plumbing Vents and Pipes
Plumbing vents are typically surrounded by large gaps. First, check if there’s a rubber boot or flashing around the pipe. If not, you’ll need to create a seal from scratch.
For gaps larger than 25mm, stuff them with unfaced fiberglass insulation first, then seal over the top with spray foam. This prevents the foam from falling through large openings and wasting material.
Make sure the foam completely surrounds the pipe and bonds to both the pipe and the framing. You want an airtight seal, not just a gap filler.
Addressing Electrical Wire Penetrations
Electrical penetrations are everywhere, and each one is a potential leak. For wires passing through drilled holes, use caulk rather than spray foam. Foam can put pressure on wires and create fire hazards.
Junction boxes need special attention. You can’t seal them completely because they need to remain accessible per electrical code. Instead, seal around the box where it penetrates the drywall, and make sure the box itself is rated for airtight installation.
Fixing Recessed Lighting Leaks
Old recessed lights are a nightmare for air sealing. You have two options: replace them with IC-rated airtight fixtures, or build an airtight box around them.
If you’re building a box, use rigid foam board or drywall. The box needs to be large enough to maintain clearance from the fixture (check the fixture’s rating) and must be completely sealed to the attic floor with caulk or foam.
Replacing with airtight fixtures is easier and more effective. Look for fixtures specifically labeled as airtight and IC-rated for contact with insulation.
Insulating and Sealing Attic Hatches
Your attic hatch needs weatherstripping around all four edges. Use self-adhesive foam weatherstripping that compresses when the hatch closes. Apply it to the frame, not the hatch itself, so it creates a seal when closed.
Add insulation to the hatch by gluing rigid foam board to the attic side. You want at least R-20 insulation value, which means about 100mm of rigid foam. Use construction adhesive and make sure the foam is securely attached.
Consider adding latches or hooks to hold the hatch tightly closed against the weatherstripping. Gravity alone often isn’t enough to create a good seal.
Sealing Chimney and Flue Chases
This is where you need high-temperature materials. Regular caulk and foam will melt or catch fire near hot chimneys. Use high-temperature silicone caulk rated for at least 260°C.
Maintain the required clearance from combustible materials (typically 50mm for masonry chimneys, more for metal flues). You can use sheet metal to create a barrier, then seal the sheet metal to the framing with high-temp caulk.
Never use spray foam directly against a chimney or flue. It’s a fire hazard and violates building codes.
Best Practices for Quebec Climate Conditions
Balancing Air Sealing with Proper Ventilation
Here’s something critical: your attic needs ventilation. When you seal air leaks, you’re stopping air from flowing through the attic floor, but you still need air to flow through the attic space itself.
Make sure your soffit vents and ridge vents are clear and functioning. The rule of thumb is one square foot of ventilation for every 150 square feet of attic space. In Quebec’s climate, good ventilation prevents ice dams and moisture problems.
Don’t block the airflow path from soffit to ridge when you’re working. Keep insulation baffles in place to maintain that air channel.
Preventing Ice Dams Through Air Sealing
Ice dams form when heat escaping through your roof melts snow, which then refreezes at the cold eaves. Air sealing stops that heat loss at the source. Combined with proper insulation and ventilation, it’s the most effective way to prevent ice dams.
Pay special attention to sealing the perimeter of your attic where the roof meets the walls. This area is often poorly insulated and allows significant heat loss.
Common Mistakes to Avoid
Over-Sealing Without Adequate Ventilation
Some homeowners get enthusiastic and seal everything, including ventilation paths. Don’t do this. Your attic needs to breathe. Seal the attic floor to stop air from your living space entering the attic, but maintain ventilation through the attic space itself.
Using Incorrect Materials for High-Temperature Areas
Regular spray foam near chimneys is a fire waiting to happen. Always use materials rated for the temperatures they’ll encounter. When in doubt, use sheet metal and high-temp caulk.
Measuring Success and When to Call Professionals
You’ll know your air sealing worked when your heating bills drop and your home feels more comfortable. The temperature should be more consistent between rooms, and you should feel fewer drafts.
Track your energy bills for a few months after sealing. Many Quebec homeowners see reductions of 15-30% on heating costs after proper air sealing, though results vary based on how leaky your house was initially.
Signs You Need Professional Insulation Services
Some situations require professional help. If you have extensive water damage, mold growth, or structural issues in your attic, call a professional before attempting air sealing. Complex roof structures with multiple valleys and dormers are also better left to experts.
Professional insulation services in Quebec can perform comprehensive energy audits, including blower door tests and thermal imaging. They’ll identify problems you might miss and guarantee their work. If you’re uncomfortable working in tight spaces or at heights, professional installation is worth the investment.
The payback period for professional air sealing typically ranges from 3-7 years depending on your home’s condition and energy costs. Given Quebec’s cold winters and high heating costs, that’s a reasonable investment in your home’s efficiency and comfort.