
Introduction
It is a February night in Quebec. The wind cuts across the street and your living room still feels chilly even though the thermostat says 21 C. Touch an exterior wall and it is cold to the hand. Drafts creep from the outlets, the furnace cycles like it is training for a marathon, and the heating bill climbs. If you came here searching how to insulate walls, you are probably tired of paying for heat that slips outside. You want real fixes that improve energy efficiency and comfort without guesswork.
Here is the quick win many homes miss. Proper wall insulation in our cold Zone 6 and Zone 7 conditions can trim winter waste in a big way. With the right materials and airtight technique, wall upgrades can often cut heating costs by about 15 to 25% in Quebec homes. That is not magic. It is simple physics and solid building science focused on heat loss prevention and moisture control.
This guide shows you exactly how to get there. We will explain the main insulation types that actually work in walls, how each is installed, what drives insulation cost, and when DIY makes sense versus calling a pro. You will see where spray foam shines, when fiberglass batts are fine, how blown-in cellulose helps finished walls, and why rigid foam is powerful against thermal bridging. We will flag Quebec-specific considerations so you make choices that hold up to real winters. By the end, how to insulate walls will feel clear and doable, whether you plan a weekend wall insulation installation or a full professional retrofit.
A heads up on scope. This is a deep, bookmark-it resource that pairs practical steps with code-aware guidance. We focus on performance, not hype. You will get checklists, comparisons, and plain-language advice you can act on today. No fluff. Just what works in wood-framed Quebec homes.
One last point that sets wall work apart from other home insulation projects. Walls are full of obstacles. Electrical boxes, pipes, and wiring. They also face wind-driven rain and big temperature swings. That means details matter a lot. Proper air sealing, smart vapor barrier placement, and attention to stud-related thermal bridging determine whether your upgrade pays off or causes new problems. Get those right and your rooms feel warmer with less energy, winter after winter.
Understanding Wall Insulation Basics: Types, R-Values, and Quebec Requirements
Wall insulation fills the spaces where heat slips out and cold pushes in. It sits inside the wall assembly as part of the building envelope and slows heat flow so rooms stay warm with less energy. When you improve insulation, you also improve comfort, noise control, and often air quality. In Quebec, with long, dry winters and quick freeze-thaw cycles, getting this layer right matters a lot.
What Is Wall Insulation and Why It Matters
Insulation works by adding thermal resistance to a wall. Heat moves three ways. Conduction through solid materials. Convection through moving air. Radiation across open spaces. Good wall insulation reduces all three. The number you see on packaging, the R-value, is the resistance to heat flow per inch or per product thickness. Higher R means better resistance.
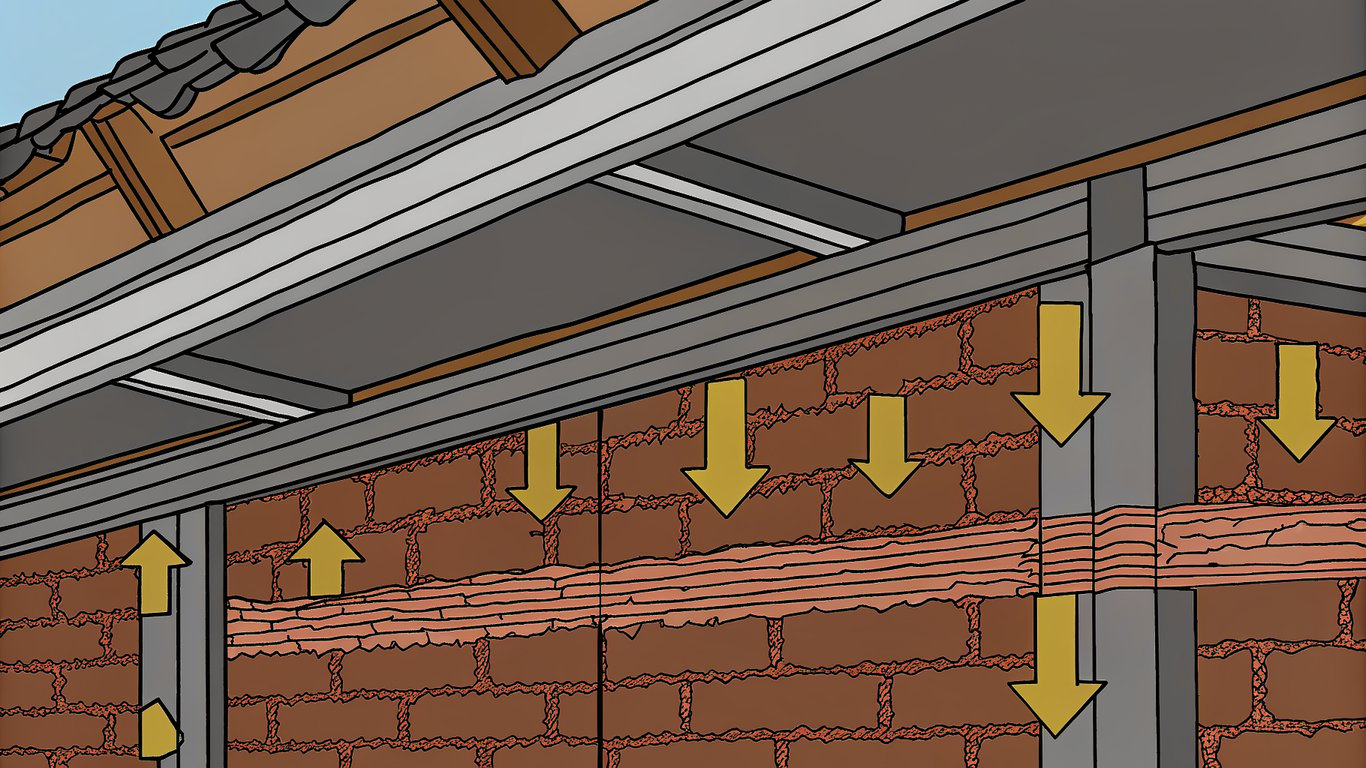
Quebec sits largely in Climate Zones 6 and 7 in Canada, which means long heating seasons and big temperature swings. Cold outside air tries to push warm indoor air out of your walls. That creates pressure differences and moisture risks if the wall is not sealed and managed correctly. Two concepts drive performance here. Air sealing and thermal bridging. Air leaks bypass insulation and can soak materials with moist indoor air. Thermal bridges are the wood or steel studs that cut through the insulation layer and conduct heat. Even with perfect cavity insulation, those studs lower the true or “effective” R of the wall, which is why continuous exterior insulation is so popular in cold regions.
- Lower heating bills and steadier indoor temperatures
- Fewer cold spots and drafts near exterior walls
- Quieter rooms thanks to denser materials like mineral wool
- Lower risk of condensation inside walls when paired with proper air sealing
- Better resilience during power outages since walls lose heat more slowly
- Higher home value if done to code with quality materials
R-Value Requirements for Quebec Climate Zones
Code targets and best-practice recommendations are not always the same. Local bylaws and the National Building Code of Canada set minimums, and many builders in Zones 6 and 7 aim higher for comfort and energy savings. Always confirm with your municipal inspector and review the latest Canadian building codes before you buy materials. The ranges below reflect typical goals that perform well in Quebec homes. If you add continuous exterior insulation, you can often meet targets with a thinner cavity batt while reducing thermal bridging.
| Wall type | Typical target R-value range | Notes |
|---|---|---|
| Above-grade exterior framed walls | R-20 to R-24 | Often 2×6 studs with high-density batts or batts plus exterior rigid foam |
| Basement walls (below grade) | R-12 to R-20 | Commonly rigid foam against concrete plus framed wall with batts |
| Rim joist / box sill areas | R-20 or higher | Air seal first. Closed-cell spray foam or rigid foam performs well here |
| Interior partition walls | Not energy rated | Insulate for sound control if desired; energy savings are minimal |
One quick nuance. The labeled R of your insulation is not the same as the whole-wall R. Wood studs, plates, and headers create thermal bridging paths. A 2×6 wall with an R-22 batt typically delivers a whole-wall R that is a few points lower, often in the mid-teens, depending on framing fraction and details. Adding a continuous rigid foam layer outside the sheathing, even 1 to 2 inches, can bump effective R significantly and cut condensation risk at the sheathing.
Types of Wall Insulation Materials Compared
Picking a material is not just about the biggest R-value per inch. You need to weigh cost, moisture behavior, fire resistance, and how easy it is to install well. In cold climates, the placement of the vapor barrier and the air barrier matters as much as the insulation itself. Costs below are broad, typical ranges in Quebec. Pricing varies by thickness, brand, and market conditions, so treat them as ballpark.
| Insulation type | Typical R per inch | Typical cost per sq ft | Moisture resistance | DIY-friendliness | Best applications |
|---|---|---|---|---|---|
| Fiberglass batt insulation | About R-3.2 to R-3.7 | Approx. CAD 0.60 to 1.50 (material-only) | Does not like liquid water; can dry if ventilated. Needs good air sealing and a proper vapor barrier | High. Easy to cut and place with care | Open stud bays in above-grade walls; quick retrofits when drywall is off |
| Mineral wool (rock wool) batts | About R-4.0 to R-4.3 | Approx. CAD 1.00 to 2.25 (material-only) | Hydrophobic fibers resist moisture; noncombustible | Moderate to High. A bit stiffer than fiberglass and trims cleanly | Exterior walls and basements where moisture or fire resistance is a concern |
| Blown-in cellulose (dense-pack) | About R-3.5 to R-3.8 | Approx. CAD 2.00 to 4.00 (installed, dense-pack) | Can buffer moisture; requires tight air sealing to avoid settling and convection | Low to Moderate. Equipment and technique matter for dense-pack | Retrofits in closed cavities through small holes; good for older homes |
| Spray foam insulation (open-cell and closed-cell) | Open-cell ~ R-3.6 to R-3.8; Closed-cell ~ R-6.0 to R-7.0 | Open-cell: ~ CAD 1.50 to 3.00 per inch (installed); Closed-cell: ~ CAD 3.00 to 5.50 per inch (installed) | Closed-cell resists moisture and can act as a vapor retarder at sufficient thickness; open-cell is vapor-permeable | Low for DIY. Professional installation is typical | Small, complex areas and rim joists; closed-cell for high R in thin spaces and improved air sealing |
| Rigid foam insulation (EPS, XPS, Polyiso) | EPS ~ R-3.6 to 4.2; XPS ~ R-5.0; Polyiso ~ R-5.6 to 6.5 | Approx. CAD 0.70 to 2.50 per inch (material-only), varies by type | Varies. XPS and foil-faced polyiso are low-perm; EPS is more vapor-open | Moderate. Cutting, taping seams, and detailing matter | Continuous exterior insulation to cut thermal bridging; interior basement walls against concrete |
A quick note on rigid foam selection. Polyiso lists a high R per inch, but its effective R can dip at very low temperatures, which Quebec sees often. EPS and XPS are more stable in deep cold. That does not mean polyiso is a bad choice. It just means you should size the thickness wisely and detail the air barrier carefully. When in doubt, look at the whole assembly and not just one number.
Moisture control is the quiet partner here. In cold climates the vapor barrier usually belongs on the warm-in-winter side of the wall. Many Quebec homes use 6 mil polyethylene behind drywall. Others use smart vapor retarders that tighten in winter and open in summer. Either way, pair vapor control with excellent air sealing at seams, top and bottom plates, electrical penetrations, and around windows. If you add enough continuous exterior rigid foam, you can often relax the interior vapor barrier, but that must follow code and good hygrothermal design. Always confirm details with your local authority and the current Canadian building codes.
If you are comparing materials or debating spray foam insulation versus batt-and-board approaches, get at least two quotes. Labor and detailing can swing total cost more than the product choice. Isolation Maison can help you compare pricing from vetted contractors who work with fiberglass batt insulation, blown-in insulation, rigid foam insulation, and spray foam insulation so you see the real picture for your walls.
How to Insulate Walls: Step-by-Step Installation Guide
Tools and Materials You’ll Need
You can do a clean wall insulation installation with basic carpentry tools and some patience. I keep the list short and realistic. If you already own a few of these, your out-of-pocket drops fast. Tool prices vary by brand and store, so take these as typical CAD ranges in Canada rather than fixed quotes.
- Utility knife with snap-off blades and a spare pack of blades (typically CAD 5 to 20 for knife, 5 to 15 for blades)
- Tape measure, 25 ft or 8 m (typically CAD 10 to 30)
- Straightedge or insulation cutting guide, a 4 ft level works (typically CAD 20 to 50)
- Staple gun with 1/4 in to 3/8 in staples for poly and stapling tabs (typically CAD 20 to 40 for gun, 5 to 10 per box of staples)
- Marking pencil or fine-tip marker (a few dollars)
- Dust mask or respirator; fiberglass sheds tiny fibers. A disposable N95 works for batts, and a half-mask respirator with organic vapor/P100 cartridges is needed for two-component spray foam (typically CAD 20 to 50 for a box of disposable masks, 40 to 120 for a reusable respirator with filters). See PPE options at Home Depot Canada.
- Safety glasses and work gloves, ideally cut-resistant gloves when cutting batts (typically CAD 10 to 40 for glasses, 10 to 30 for gloves)
- Long-sleeve shirt and pants or disposable coveralls to reduce itch (typically CAD 10 to 30 for disposable suits)
- Caulking gun for sealants (typically CAD 10 to 25)
- Acoustic sealant or high-quality caulk for air sealing (typically CAD 5 to 12 per tube)
- One-part expanding spray foam can for gaps and penetrations. Choose low-expansion for windows and doors (typically CAD 8 to 20 per can)
- Two-component spray foam kit and application gun only if you are trained and prepared for it. These are expensive and require strict PPE and ventilation (kit costs vary widely and often run into hundreds of dollars)
- Fiberglass batt insulation or mineral wool batts sized for your studs. For 2×4 walls many use R-12 to R-14. For 2×6 walls many use R-20 to R-24
- 6 mil polyethylene sheet for interior vapor barrier where required by code, plus sheathing tape and acoustic sealant for seams
- Short saw or serrated insulation knife for mineral wool if you choose mineral wool (typically CAD 10 to 30)
- Ladder or step stool for taller wall bays
- Garbage bags or contractor bags for offcuts and debris
Safety first: Fiberglass and mineral wool are irritants. Wear eye protection, gloves, and a mask. If you plan to use two-component spray foam insulation, a half-mask respirator with the right cartridges is non-negotiable, and you need ventilation plus skin coverage. If that sounds like a stretch, hire a pro for the foam and do the batts yourself. That split saves money and headaches.
Preparing Your Walls for Insulation
Prep work is where you win. You are not just stuffing cavities. You are creating a continuous thermal and air seal that actually performs in Quebec winters. Slow down here and everything after goes smoother.
- Inspect framing and sheathing: Look for rot, moldy smells, staining, or dark rings on wood. Fix water entry before you insulate. No exceptions.
- Dryness check: If a wall had a leak, it needs to be dry. Many contractors aim for wood moisture content in a safe range before closing walls. If you are unsure, wait and ventilate or consult a pro.
- Remove debris and old failed insulation: Vacuum out sawdust, rodent droppings, and loose scraps. Clean bays help batts fit right.
- Air sealing pass: Seal the obvious holes and cracks first. Use acoustic sealant or caulk along bottom plates and top plates, around plumbing and electrical penetrations, and at sheathing seams you can reach from the inside. Use one-part spray foam for gaps larger than a crack but smaller than about 1 inch. Use low-expansion foam around window and door frames to avoid warping.
- Block wind washing: If there are large openings to vented areas, close them appropriately. You want the insulation protected from moving air.
- Plan your vapor barrier: In most cold-climate Quebec homes, a 6 mil polyethylene vapor barrier on the warm-in-winter side is typical. If you have continuous exterior rigid foam or a special wall assembly, requirements can change. Confirm with your local building authority.
- Electrical safety: Turn off power to any circuits you will be working near. Do not pack insulation inside electrical boxes. Maintain access to junction boxes, and keep them flush with the finished drywall later. For code references in Quebec, see RBQ guidance that aligns with the Canadian Electrical Code at RBQ Electrical Code chapter.
DIY reality check: If your walls show moisture issues, complex wiring, or odd framing, you can still do the batts but consider bringing in a licensed electrician for the wiring work and a building pro for moisture diagnostics. The insulation materials only work well when the assembly is dry and the air sealing is solid.
Installing Fiberglass Batt Insulation
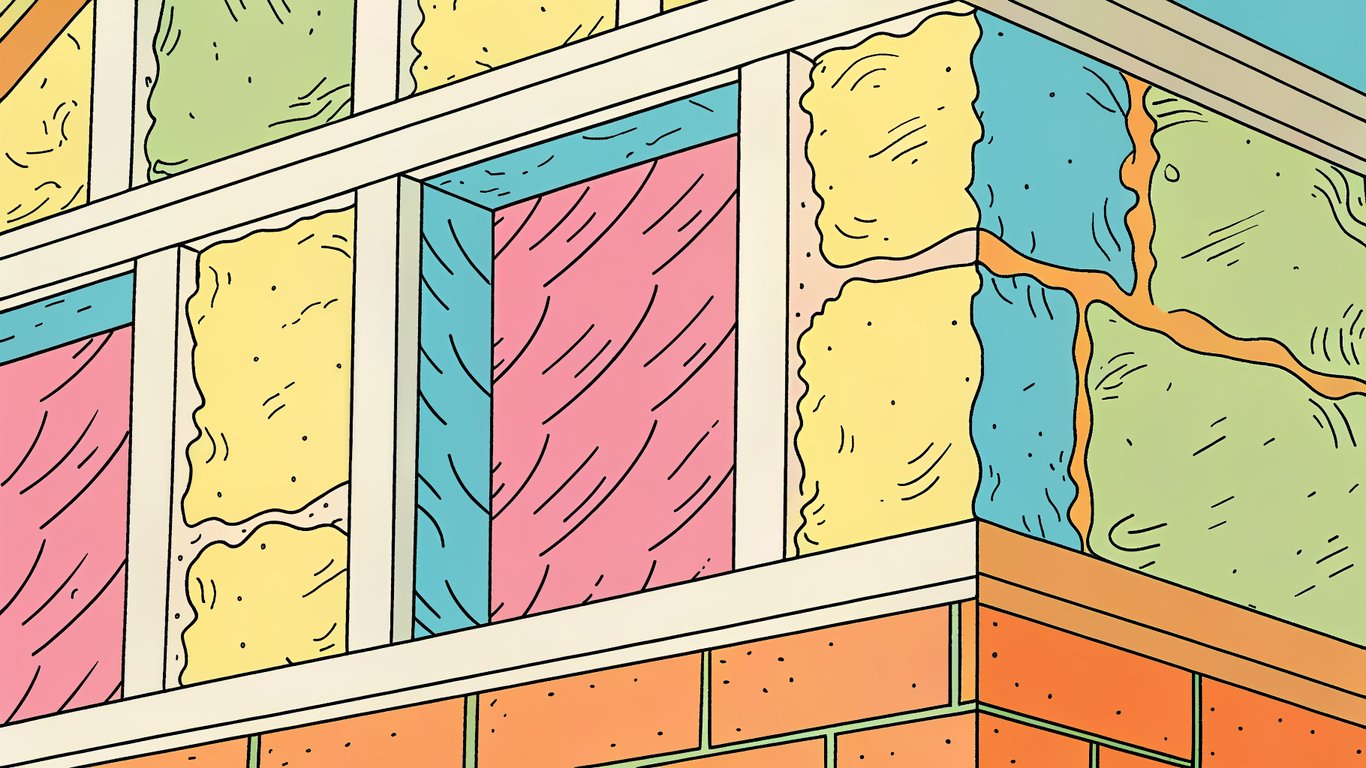
I am focusing on unfaced fiberglass batt insulation because it is the most common DIY insulation in stud walls. Mineral wool follows the same approach, although it cuts cleaner with a serrated insulation knife and handles moisture a bit better. The goal is a snug fit against all sides of the cavity without crushing the fibers. Compression reduces R-value, and gaps create cold spots.
- Measure the cavity: Check stud spacing and cavity height. In Quebec homes you will often see 16 in on center studs, sometimes 24 in. Measure the actual open width. Lumber moves and rough framing is not always perfect.
- Pre-cut batts: On a clean surface, place a straightedge over the batt and cut with a sharp utility knife. Cut about 1/2 in wider than the cavity when working with fiberglass. That friction fit helps seal edges without staples. Replace blades often. Dull blades tear fibers.
- Start at the top: Place the batt into the top of the cavity first, then slide the rest in. Use your open palms, not fingertips, to avoid compressing a ridge down the middle.
- Seat the batt to the sheathing: Reach in and gently tease the insulation so it touches the back sheathing fully. No hollow spots. If the sheathing is irregular, work the batt so it follows the surface.
- Split for wires: When a wire runs horizontally or vertically, do not push it to the back. Instead, gently split the batt thickness. Pull the front half forward, pass the wire through the slit, then lay the front half back. Now the wire sits in the middle without a void in front or behind.
- Notch for boxes: For an electrical box, hold the batt in place, mark the box outline a tad undersized, then cut a clean notch so the batt fits tightly around the box. Do not stuff insulation into the box.
- Avoid compression at corners: Corners and T-intersections can be narrow. If a full batt will not fit without crush, cut a thinner strip so the cavity is full but not jammed. Two smaller pieces that fit well beat one piece that is pressed flat.
- Fill small gaps and slivers: Where you have a sliver smaller than a full batt, cut a piece that fits exactly. No loose stuffing. Keep fibers aligned with the cavity. For sub-1 in cracks, use low-expansion foam rather than hair-like strips.
- Check plane and depth: The face of the batt should sit flush with the stud faces, not bulge out and not sit recessed. If it bulges, you cut it too wide. Trim and refit.
- Quality sweep: Run your hand over the surface and press lightly. You should not feel big voids. Add pieces where you feel a hollow. Keep the face continuous from bottom plate to top plate.
Pro tip: Cut on a scrap piece of plywood so your blade stays sharp longer. If your batts shed, mist the cutting area very lightly with water to keep fibers down. And if a stud bay is out of square, template it with cardboard first, then transfer the shape to the batt for a tighter fit.
Common mistakes to avoid: Do not wrap batts around pipes so tight that you crush them. Do not leave gaps behind wires. Do not leave diagonal gaps at the bottom of a bay where you miscut height. And do not mix faced batts with a separate interior poly unless code and your assembly demand it. You generally want one continuous vapor barrier on the warm side, not two layers that can trap moisture.
Working Around Obstacles: Wires, Outlets, and Pipes
Obstacles slow people down. That is where performance often falls apart. Here is how I tackle the trouble spots so your DIY insulation does not have weak points.
- Horizontal wires: Split the batt thickness at wire height for the full length of the bay. Lay the bottom half in first, set the wire in the midline, then close with the top half. No bulge, no void.
- Vertical wires at stud faces: If a wire hugs a stud face, cut a vertical slit on the batt face so the wire sits in the slit. Keep the rest of the batt fully contacting the sheathing.
- Electrical boxes: Notch batts to fit tightly around the box perimeter. Do not put insulation inside the box. Keep the front face of the batt flush with studs so the future drywall can sit flat on the box edges.
- Plumbing pipes on exterior walls: Pipes should ideally not be in exterior walls in cold climates. If they are, keep insulation between the pipe and the cold sheathing. You can add a shaped piece of rigid foam behind the pipe to maintain a thermal buffer, then fill the rest with batt. Do not compress around the pipe so much that it loses R-value.
- Small odd gaps: Use one-part low-expansion spray foam for cracks under about 1 in. For hairline seams at framing, acoustic sealant works well and stays flexible. For anything larger than about 1 in but smaller than a full batt, cut a precise insert.
- Windows and doors: Use low-expansion foam rated for windows and doors. High-expansion foam can bow the frame. Fill only two-thirds of the depth and let it expand. Top up after it cures if needed.
- Around chimneys and flues: Follow the appliance or flue manufacturer clearance requirements. Do not place combustible insulation too close to hot flues. This is a code and safety issue.
- Fire blocking and draft stopping: If there are open chases or cavities that connect floors, install proper fire blocking per code before insulating. It protects both safety and performance.
Code note: The Canadian Electrical Code is adopted in Quebec through provincial regulation. You should not cover junction boxes or create conditions that make them inaccessible. For a high-level reference on how Quebec integrates the code, see the RBQ page here: RBQ Electrical Code chapter. If you are unsure about a specific electrical situation, pause and speak with a licensed electrician.
Installing Spray Foam Insulation
Spray foam shines in spots where batts struggle. Think narrow cavities, complex shapes, rim joists, and areas that demand both insulation value and air sealing in one move. You will see two main types in walls. One-part cans for small gaps and two-component kits for larger coverage. Two-component kits are a serious undertaking. They require precise temperature control, proper PPE, and careful technique.
- When to consider DIY foam: Small air leaks, perimeters of windows and doors, pipe penetrations, and weird little voids you cannot fill with batts. One-part cans are perfect here.
- When to hire pros: Large wall areas, deep cavities, and any closed-cell foam application where chemical mixing, substrate temperature, and lift thickness matter. Pros use heated proportioners and spray rigs that deliver consistent results and meet code fire-safety requirements.
- Basic one-part can technique: Shake the can thoroughly. Practice on cardboard. Insert the straw and apply a bead in the middle of the gap and let it expand. For windows and doors, use a low-expansion product. Trim excess after cure with a knife.
- Basic two-component kit overview: If you do proceed, read the full manufacturer manual. Condition tanks to the recommended temperature. Spray in thin lifts, typically about 1 in at a time, allowing each pass to rise and cure. Maintain ventilation, wear a respirator with organic vapor/P100 filters, gloves, and full skin coverage. Keep a watch for off-ratio foam, strange odor, or oily residue. Stop and troubleshoot if anything seems off.
Safety reminder: Two-component foam reacts fast and gives off fumes while curing. Protect your lungs and eyes. Ventilate. Keep ignition sources away. If you are not fully confident, this is the point where a professional installer earns their fee while you handle the simpler DIY insulation tasks.
Adding Vapor Barriers and Air Sealing
Insulation materials slow heat flow. They do not stop air or vapor by themselves. In a Quebec winter, warm indoor air carries moisture that wants to move into colder wall layers. Your vapor barrier and air sealing plan protect the assembly from condensation and heat loss. Get this right and your batts actually reach their rated performance.
- Where the vapor barrier goes: In cold climates, the vapor barrier typically sits on the interior, warm-in-winter side of the wall. Most commonly it is 6 mil polyethylene installed continuously over studs and batts. If you have substantial exterior rigid foam or a specialty wall design, consult local code or a building professional before you add interior poly.
- Install the poly: Unroll horizontally or vertically and staple to studs with minimal holes. Keep the sheet tight but not stretched to the point it tears. Overlap seams by at least a few inches. Run poly behind electrical boxes with poly boots if you have them, or carefully seal around the box edges to maintain the air barrier.
- Seal every seam: Use sheathing tape rated for poly and a continuous bead of acoustic sealant at plates and around penetrations. The tape handles visible seams. The acoustic sealant is your hidden hero. It stays flexible and seals edges that tape alone cannot.
- Penetrations and edges: For pipes, wires, and ducts, use tape patches and sealant. Around windows and doors, tie the poly into the frames using tape and sealant so the air barrier is continuous.
- Final air sealing sweep: Before drywall, walk the walls with a bright light. Look for tears, missed corners, or loose tape. Seal them now. Drywall is not a reliable air barrier by itself unless detailed that way.
| Common mistake | What happens | Correct technique |
|---|---|---|
| Compressing batts to fit tight spots | R-value drops and cold stripes form | Cut the batt to exact size so it sits flush without crushing fibers |
| Leaving gaps around wires or at stud edges | Air leakage and thermal bypass create drafts | Split the batt for wires and cut precise inserts for slivers |
| Pushing wires to the back of the cavity | Voids in front of the wire reduce insulation effectiveness | Keep the wire mid-batt by splitting the insulation thickness |
| Stuffing insulation into electrical boxes | Code and safety issue, possible overheating and messy finishes | Notch batts around boxes and keep the box interior clear |
| Installing vapor barrier with holes and loose seams | Moist indoor air finds its way into the wall | Staple neatly and seal all seams with tape and acoustic sealant |
| Using high-expansion foam at window and door frames | Frames can bow and bind, windows may not operate | Use low-expansion foam labeled for windows and doors |
| Double vapor barriers in the same assembly | Moisture can get trapped between layers | Follow one continuous interior vapor barrier unless your assembly calls for a different strategy |
| Ignoring moisture stains or musty smells | Hidden mold or ongoing leaks get buried | Find and fix the source. Insulate only after it is dry and stable |
| Burying junction boxes behind poly without sealing details | Air leakage paths and poor blower-door performance | Use box gaskets or poly boots, then tape and seal around the boot edges |
One more PPE note: If you prefer a shopping list from a big-box store, check safety gear categories at Home Depot Canada. Look for N95 or better filtering for fiberglass work, and an appropriate cartridge respirator if working with two-component foam.
At this point your wall should have tight-fitting batts, clean detailing at wires and boxes, and a sealed interior poly layer. That combination tackles conduction, convection, and moisture diffusion. It is how you get the rated performance in real life, not just on the bag label.
Extra Pointers That Save Time and Improve Results
- Cutting station: Set up a dedicated cutting area with a sacrificial board so you are not dulling blades on concrete.
- Blade discipline: Change blades as soon as they drag. Clean cuts fit better and shed fewer fibers.
- Sequence matters: Air seal first, then insulate, then vapor barrier, then drywall. Skipping the air sealing step is the number one reason walls feel cold later.
- Stud mapping: Photograph or mark stud locations before drywall. Helps avoid puncturing the poly by mistake during drywall hanging.
- Acoustic upgrade: On interior walls where you want sound control, mineral wool batts are easier to cut snug and outperform fiberglass for sound dampening in many cases.
- Insulating over kneewalls and short walls: Tie the air barrier to adjacent surfaces. Leaks love corners and transitions.
- Working in winter: Materials stiffen when cold. Keep batts and poly warm if you are working below comfortable room temperature.
Can You Really DIY This?
Short answer, yes for batts and basic air sealing. If you can measure, cut cleanly, and take your time, you can deliver professional-level results on straight stud bays. I would probably call a pro for two-component spray foam in large areas, for complex moisture problems, and for any electrical work that needs modification. That split approach is common. You handle the batts and vapor barrier. A pro handles foam and tricky details. It is honest and it works.
Wall Insulation Costs and ROI: What to Expect in Quebec
DIY Wall Insulation Costs Breakdown
Numbers vary by store, season, and region. The ranges below reflect what homeowners in Quebec typically see in 2025 to 2026. Use them to budget, then verify locally. I include materials-only per square foot figures to keep it apples to apples, plus common supplies you should not forget.
| Insulation type | Typical material cost (CAD) per sq ft | Common thickness for Quebec exterior walls | DIY-friendly | Notes |
|---|---|---|---|---|
| Fiberglass batts (e.g., Owens Corning, CertainTeed) | $0.70 to $1.50 | R-14 in 2×4, R-20 in 2×6 | Yes | Widely available. Easiest for first-time DIY insulation. Avoid compressing batts. |
| Mineral wool batts (e.g., ROCKWOOL) | $1.20 to $2.50 | R-14 in 2×4, R-22 in 2×6 | Yes | More rigid, cuts cleanly. Better moisture and fire resistance than fiberglass. |
| Blown-in cellulose (open cavity) | $0.80 to $2.00 | Fills 2×4 or 2×6 bays | Sometimes | Material is cheap. Dense-pack in closed walls needs pro equipment and training. |
| Closed-cell spray foam kit (2 lb) | $3.50 to $6.50 | Often 1.5 to 2 in as a partial fill | Advanced | Priced per thickness. Excellent air seal. Harder to get right without experience. |
| Rigid foam board (EPS, XPS, polyiso) | $0.60 to $1.50 per in | 1 to 2 in continuous exterior layer | Moderate | Often added as continuous insulation to cut thermal bridging during re-siding. |
| Supplies and tools | Typical cost (CAD) | Notes |
|---|---|---|
| 6 mil polyethylene vapor barrier | $0.10 to $0.25 per sq ft | Common for interior-side vapor control in cold climates. Check R-value requirements and code. |
| Acoustic/air-sealing sealant | $6 to $12 per tube | Seal plates, seams, and penetrations. Plan several tubes per room. |
| Sheathing or vapor tape | $12 to $25 per roll | For seams in poly and rigid foam. |
| One-part spray foam cans | $8 to $15 each | Seal small gaps around windows, wires, and pipes. |
| Staple gun + staples | $25 to $40 | For attaching batts flanges and poly. |
| Utility knife, straightedge, PPE | $40 to $100 | Knife + blades, safety glasses, gloves, mask or respirator. |
| Cellulose blower rental | $0 to $60 per day | Many retailers provide low-cost or free loan with material purchase. Call ahead. |
| Typical DIY project size | Estimated wall area | Fiberglass batts total | Mineral wool total | Cellulose total | Closed-cell kit total | What this usually covers |
|---|---|---|---|---|---|---|
| Single room | 200 to 300 sq ft | $180 to $570 | $300 to $900 | $200 to $600 | $700 to $1,900 | Two exterior walls of a bedroom or office. Add $40 to $120 for supplies. |
| Whole floor | 600 to 1,000 sq ft | $540 to $1,800 | $900 to $2,500 | $600 to $2,000 | $2,100 to $6,500 | Main floor exterior wall perimeter. Add $150 to $450 for supplies. |
| Entire house | 1,500 to 2,500 sq ft | $1,350 to $3,750 | $1,800 to $6,250 | $1,500 to $5,000 | $5,300 to $16,000 | Detached home exterior walls. Add $300 to $800 for supplies. |
DIY insulation cost is mostly materials. Your time is the wildcard. If you are tackling exterior wall insulation during an open-wall renovation, batts plus good air sealing deliver strong value for money. Spray foam kits look fast on YouTube, but they take practice and ventilation. Most homeowners skip them except for small problem spots.
Professional Installation Costs in Quebec
| Insulation method (pro installed) | Typical installed cost in Quebec (CAD) per sq ft of wall | Typical thickness/R | Notes |
|---|---|---|---|
| Fiberglass batts | $2.00 to $3.50 | R-14 in 2×4, R-20 in 2×6 | Includes labor for fitting and basic air sealing. Most cost-effective during renovations. |
| Mineral wool batts | $2.50 to $4.00 | R-14 in 2×4, R-22 in 2×6 | Higher material cost than fiberglass. Great for sound, fire, and moisture resistance. |
| Dense-pack cellulose (closed walls) | $2.50 to $4.50 | Fills existing cavities | Small holes drilled between studs. Good retrofit option. Relies on experienced crews. |
| Open-cell spray foam | $3.00 to $5.00 | About 3.5 in in 2×4 | Used less often in very cold climates unless paired with a vapor retarder. Confirm local code. |
| Closed-cell spray foam | $4.00 to $7.00 | 1.5 to 3 in | High R per inch and excellent air seal. Higher cost. Great for rim joists and tricky areas. |
| Exterior rigid foam continuous | $3.50 to $7.00 | 1 to 2 in continuous | Usually paired with new siding. Cuts thermal bridging. Pricing excludes siding work. |
What pushes price up or down? Four big ones: 1) wall accessibility and prep, 2) insulation type and target R-value requirements, 3) total square footage, and 4) the experience level of your professional insulation contractor. Complex details like stone foundations, knob-and-tube remnants, or brick veneer can add time. If you are collecting bids, a comparison service like Isolation Maison helps you line up multiple quotes so you can see market pricing for your exact scope.
Energy Savings and Payback Period Calculator
Quebec homes heat mostly with electricity, some with gas or oil. That means savings depend on both the upgrade and your utility rate. As a rule of thumb, better wall insulation plus air sealing cuts total heating by 10 to 20 percent in many older homes. Upgrading from uninsulated walls can be even bigger. Use the examples below as a starting point. Then swap in your actual annual heating spend from Hydro-Quebec or your fuel supplier.
| Upgrade scenario | Assumed wall area | Est. project cost (DIY | Pro) | Expected annual savings | Annual $ saved (example) | Simple payback |
|---|---|---|---|---|---|
| Add R-20 batts in open 2×6 walls during a renovation | 800 sq ft | $800 to $1,800 | $1,600 to $2,800 | 10% to 18% of heating | If you spend $1,800/yr on heat: $180 to $325/yr | DIY: ~3 to 10 yrs | Pro: ~5 to 12 yrs |
| Dense-pack cellulose in a 1950s home with minimal wall insulation | 1,200 sq ft | DIY not advised | $3,000 to $5,400 | 8% to 15% of heating | If you spend $2,200/yr: $175 to $330/yr | Pro only: ~9 to 17 yrs |
| Add 1.5 in exterior rigid foam during re-siding | 1,500 sq ft | N/A | $5,000 to $9,000 incremental | 5% to 12% of heating | If you spend $2,200/yr: $110 to $265/yr | Pro only: ~19 to 45 yrs on foam cost alone |
How to estimate your ROI at home: 1) Total your last 12 months of heating costs. 2) Pick a realistic savings band for your house and scope. Many older Quebec homes land near 10 to 20 percent after exterior wall insulation and air sealing. 3) Multiply your annual spending by that percentage to get a dollar savings range. 4) Divide project cost by annual savings to get simple payback. If you are re-siding anyway, use only the incremental cost of adding exterior foam. That gives a fairer payback.
One more thing. Comfort often improves right away. Rooms feel less drafty. Surface temperatures even out. That is hard to price, but it matters. And better energy efficiency tends to reduce condensation risk on cold walls when paired with correct vapor control.
Available Rebates and Incentives
Programs change, and some pause intake then restart. Always check current terms before you plan around a rebate. Start with these official pages for Quebec homeowners:
- Rénoclimat provincial program. Energy evaluation plus financial assistance for eligible insulation and air sealing measures. See official details and current amounts: Rénoclimat.
- Canada Greener Homes Loan (federal). Interest-free financing for eligible retrofits including insulation. Program status and terms can change. Check: NRCan Loan.
- Canada Greener Homes Grant (federal) status varies. Historically offered grants for insulation after an energy audit. Verify current availability: NRCan Grant.
- Oil to Heat Pump Affordability Program (federal). Not an insulation rebate, but it can change your overall payback if you are switching off oil. Details: NRCan OHPA.
Tip for maximizing incentives: schedule the energy audit early if a program requires it. Keep invoices itemized by measure. And confirm that your chosen professional insulation contractor will install to program specs for R-value requirements, air sealing, and vapor control. That way you do not miss out because of paperwork.
Bottom line on insulation cost in Quebec. Batts remain the budget hero. Dense-pack cellulose is a smart retrofit when you do not want to open walls. Spray foam solves hard problems at a higher price. Exterior rigid foam shines when you are re-siding and want to crush thermal bridging. Price your options, factor in rebates, then compare at least two quotes. The numbers usually make a pretty clear case.
DIY vs. Professional Installation: Making the Right Choice
When DIY Wall Insulation Makes Sense
Can you insulate a wall yourself? Yes, in the right situation. If you have basic carpentry skills, can measure and cut accurately, and understand how insulation interacts with the building envelope, DIY insulation is often practical for small, straightforward jobs. The sweet spot is open stud bays you can reach easily and simple materials like fiberglass or mineral wool batts. You still need to respect moisture control and follow safe work practices, but this is a project many handy homeowners in Quebec handle well.
- Walls are open and accessible, with standard 2×4 or 2×6 studs
- You are using fiberglass or mineral wool batts, not spray foam
- No visible moisture, mold, or past water damage in the wall
- Electrical and plumbing are simple, with modern boxes and wiring
- Small scope: one room or a short run of wall, not a whole-house retrofit
- You can install and seal a proper vapor barrier where required
- You are comfortable cutting around outlets and running a bead of caulk or low-expansion foam to air seal
Two quick litmus tests. If you can fit a batt snugly without compressing it and leave no gaps at the edges, you are probably ready. If the wall looks like a puzzle of pipes, wires, odd cavities, or damp spots, stop and reassess.
When to Hire a Professional Contractor
Some projects are risky or simply more cost effective with a pro. A professional insulation contractor brings specialized tools, training, and the ability to diagnose hidden problems before they turn into repairs. Call in a pro for spray foam insulation, dense-pack cellulose in closed cavities, whole-house projects, hard-to-reach areas, and any wall with moisture or air leakage problems that trace back to flashing or rain screens. You also want a pro when code compliance, fire safety layers, or permit needs are unclear. Better to get it right than redo it mid-winter.
| Wall type | DIY feasibility | Pro advantages | Key risks if DIY |
|---|---|---|---|
| Exterior stud walls (open to studs) | Good for careful DIY with batts; focus on air sealing and vapor barrier | Verify R-value target, continuity, and detailing at headers and rim joists | Gaps, compression, or missing air sealing reduce performance |
| Interior partition walls | Typically DIY friendly for sound control batts | Faster, consistent fit and firestop details where required | Poor cuts create flanking paths; wasted material |
| Basement walls (concrete or framed) | DIY possible in dry, framed sections using rigid foam + batts | Moisture diagnostics, proper foam thickness, correct furring and drainage details | Trapping moisture, mold, or frost on concrete if layered wrong |
| Cavity wall insulation in closed walls (blown-in cellulose or fiber) | Challenging DIY; specialized blowers and dense-pack technique | Even coverage, correct density, fewer voids, fewer drill holes | Voids and settling if not packed correctly; hidden wiring or pipes damaged |
| Spray foam insulation (open or closed cell) | Not recommended for DIY in most homes | Trained application, ventilation control, consistent depth | Off-ratio foam, fumes, and code compliance issues |
| Older masonry or double-wythe brick | Usually not DIY; complex moisture dynamics | Assess freeze-thaw risk, vapor profiles, and drainage plane | Spalling brick and indoor moisture problems |
Permits in Quebec are typically handled at the municipal level. They are often required when you open exterior walls, modify structure, or add exterior foam that changes the facade. When in doubt, check your city’s requirements and review the Quebec Construction Code guidance from the RBQ. You can find code resources on the RBQ site here: Quebec Construction Code.
How to Choose the Right Insulation Contractor
- Verify licensing with the RBQ. Use the official register: RBQ licence register.
- Ask for proof of liability insurance and worker coverage (for Quebec, many contractors show CNESST coverage).
- Read recent reviews, then ask for local references you can call.
- Get at least 2 to 3 written quotes with the same scope. Make sure each includes material type, target R-value, and air sealing details.
- Ask about specific experience with your wall type: basement foam over concrete, dense-pack cellulose, cavity wall insulation, or spray foam.
- Confirm warranty terms in writing. Materials typically carry a manufacturer warranty. Ask about workmanship coverage too.
- Discuss ventilation, vapor barrier strategy, and moisture control. You want their plan in plain language.
- Set a clear cleanup and disposal plan. Old insulation can be dusty and messy.
Red flags: vague scopes that skip air sealing, unusually low bids that change after work starts, no proof of insurance, or a contractor who dismisses moisture concerns out of hand. If you want to compare vetted local pros for wall insulation installation without spending your weekend phoning around, Isolation Maison helps Quebec homeowners request and compare multiple quotes from qualified contractors: isolationmaison.ca.
Quick tip when comparing quotes. Normalize the details. Same R-value target, same insulation type, same square footage, and the same list of prep tasks and air sealing. Then you are comparing apples to apples.
Common Wall Insulation Mistakes to Avoid
| Mistake | What goes wrong | How to fix or avoid it |
|---|---|---|
| Compressing batts to fit | Crushed batts lose R-value and create cold spots | Cut batts to width; split around wires; never stuff tight |
| Leaving gaps or voids | Air leaks and heat loss through the path of least resistance | Fit snug to studs and plates; seal edges with caulk or low-expansion foam |
| Missing or misplaced vapor barrier | Moisture gets into the wall and can condense in winter | Follow Quebec code for location; seal seams and edges carefully |
| Skipping air sealing | Insulation performs poorly if air can bypass it | Seal penetrations, top and bottom plates, and rim joists before insulating |
| Ignoring existing moisture issues | Mold, rot, and damage to finishes and framing | Fix leaks first; add proper drainage and ventilation strategies |
| Choosing the wrong R-value or material | Underperforming walls or code compliance problems | Match material to cavity depth and climate targets; verify with code references |
| DIY spray foam without training | Off-ratio foam, fumes, poor adhesion, and safety risks | Hire a certified spray foam installer for reliable results |
Bottom line. DIY insulation is smart for small, accessible projects where the details are simple and you can control air sealing and vapor barriers. Complex jobs, moisture-heavy spaces, and anything involving spray foam or dense-pack are best left to a pro. Whether you do it yourself or hire out, the goal is the same: continuous insulation, tight air sealing, correct vapor control, and a wall assembly that stays dry and warm through a Quebec winter. If you do bring in a contractor, confirm licensing on the RBQ register and ask how their plan meets the Quebec Construction Code. That little bit of homework pays off for years.